This guide goes over how to set a static IP address for the Wi-Fi and LAN datalogger S2-WL-ST.
Before following the steps below please make sure you do the following four things:
1. Download the SolisCloud mobile application for your phone by going to the app store and then searching “SolisCloud”.
The icon for the app should look like this:

2. After downloading the app, register an Organization account.
For guidance on account setup, please watch this video: https://youtu.be/3Aey783Nfg0?si=sbd7kUZiVIwr6Ofv
3. Turn the inverter on and make sure the logger LED lights are also on.
PWR light should be solid red
COM light should be flashing amber & should eventually turn solid
NET light should be flashing green
4. Plug in the LAN cable to the bottom of the logger after doing the following three assurance checks:
a. Be sure you tested the cable with an ethernet cable tester
b. Verify that there are no firewalls that are going to block the logger
c. Plug the cable into a laptop to ensure there is internet connectivity and no restrictions
Steps for Setting a Static IP Address:
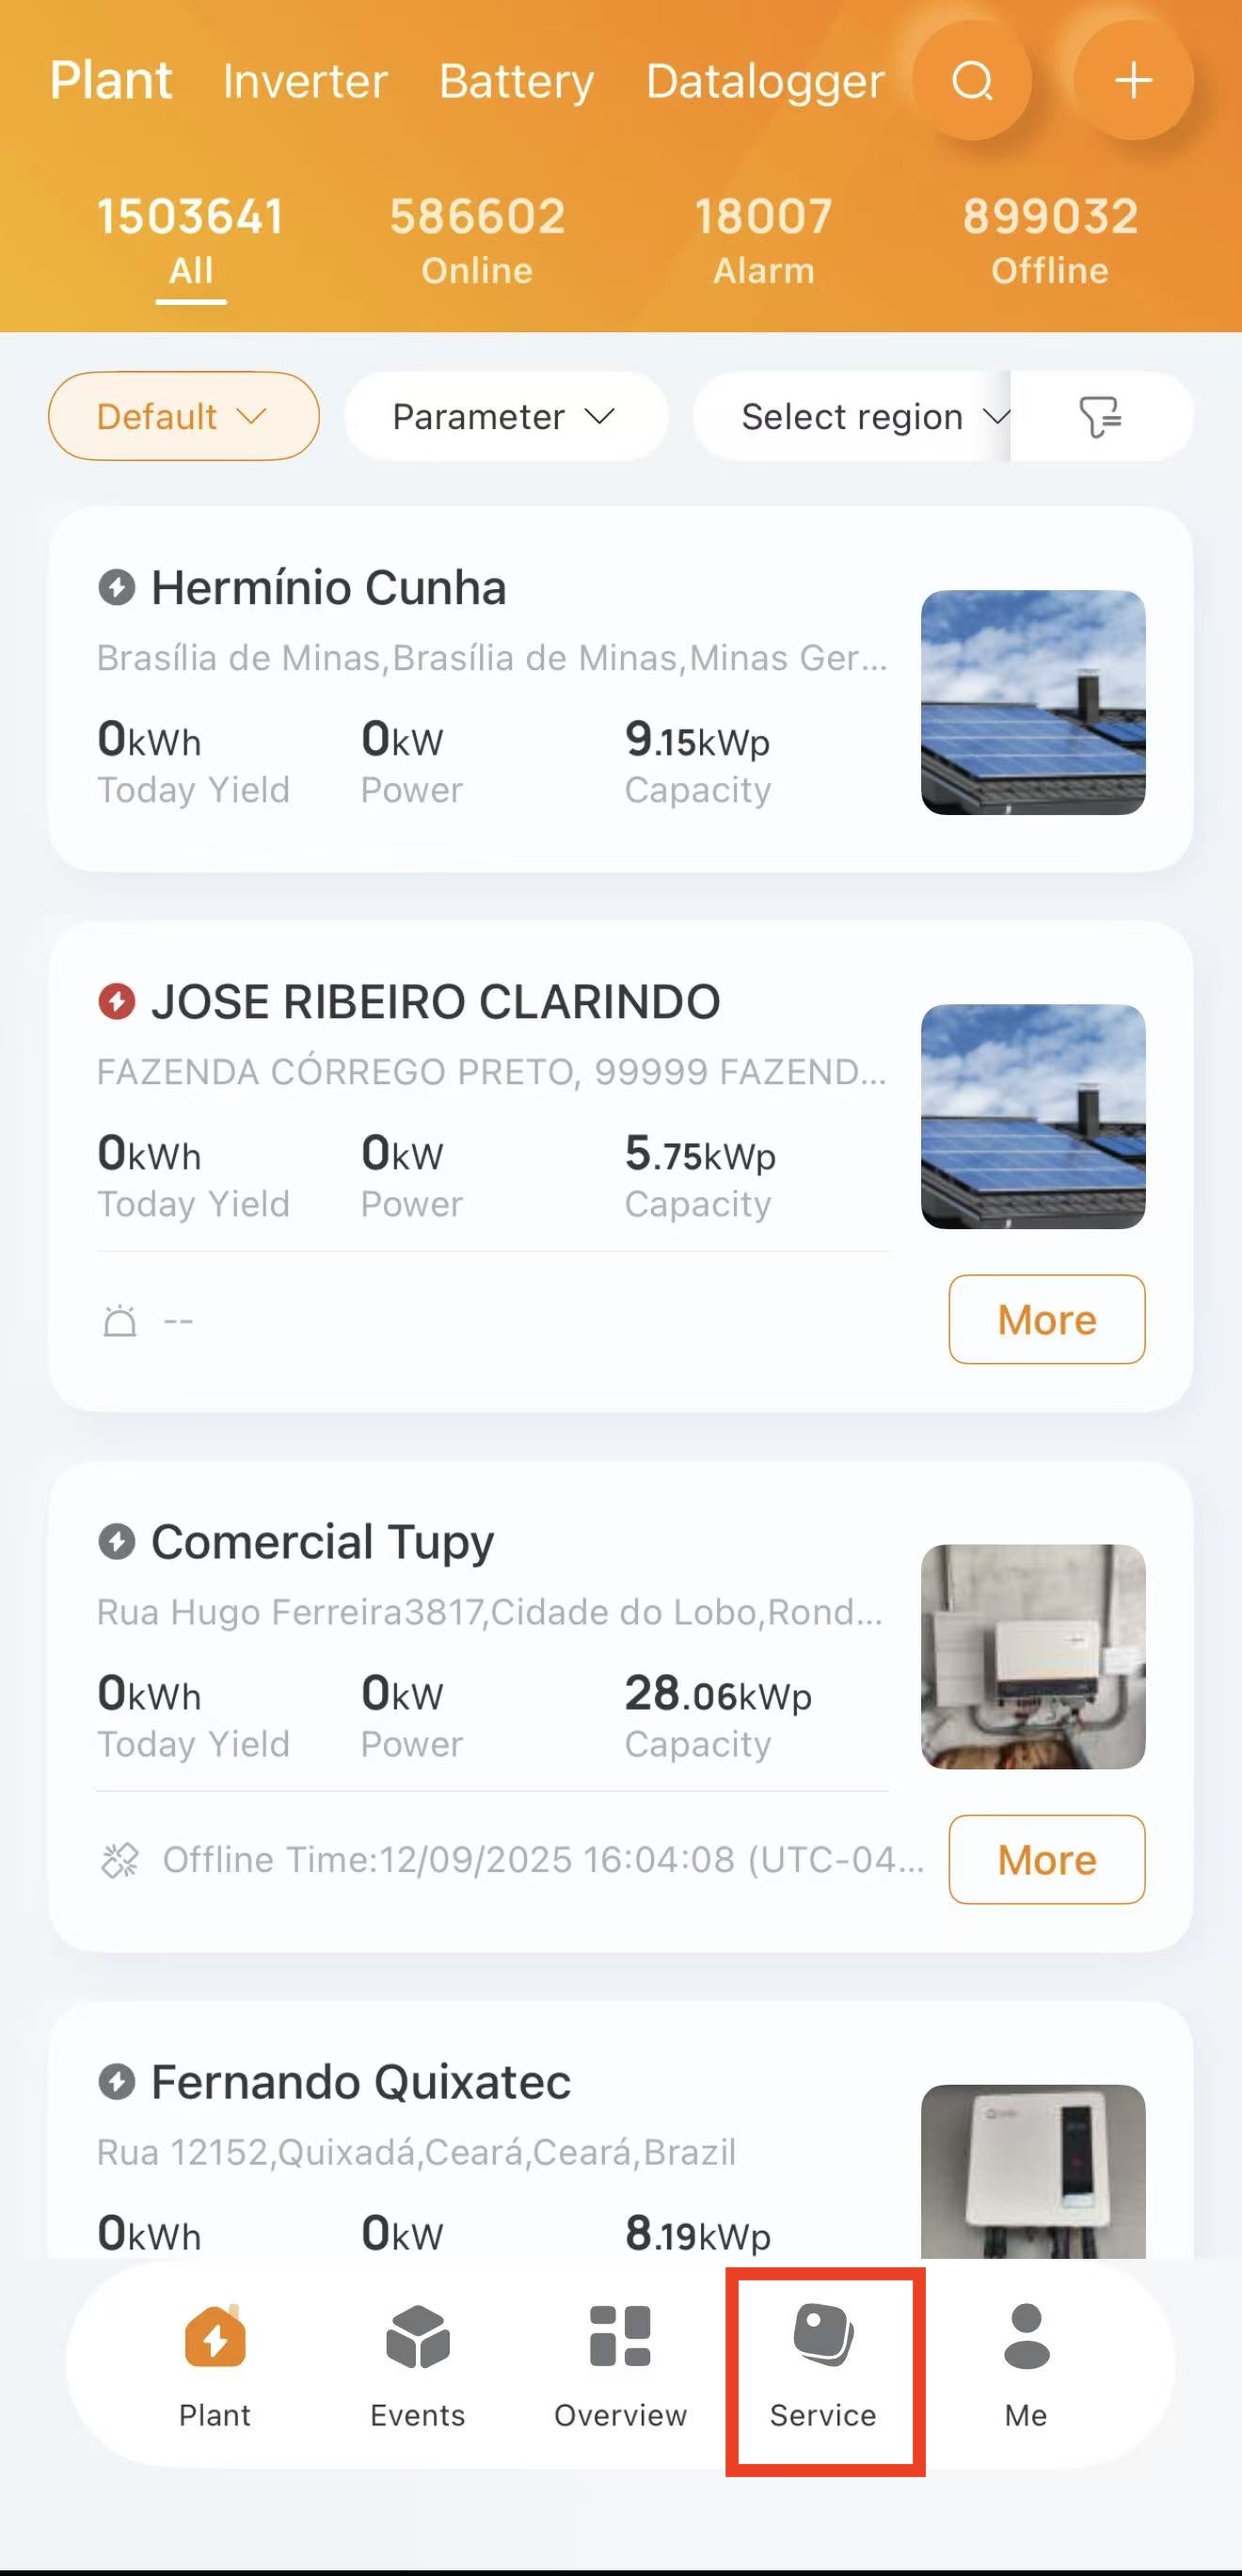
Step 1: Open SolisCloud, log in, and then tap Service in the bottom right corner of the page.
Step 2: Tap Local Debugging

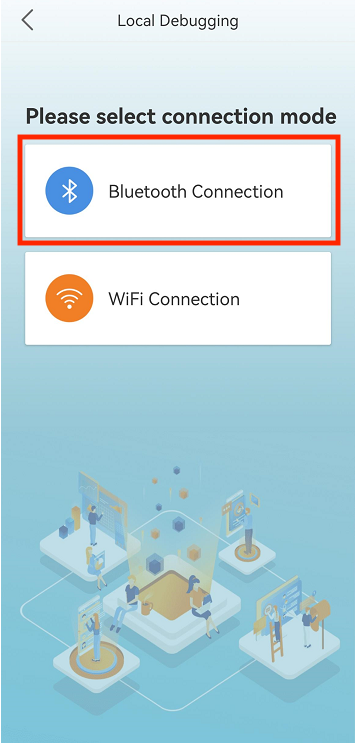
Step 3: Tap Bluetooth Connection. Do not tap WiFi connection.
Make sure your phone Bluetooth is turned on.
Step 4: Tap the device that appears “D_serial number of the logger"
Note: It should say “Nearest Connection” in green under the device name

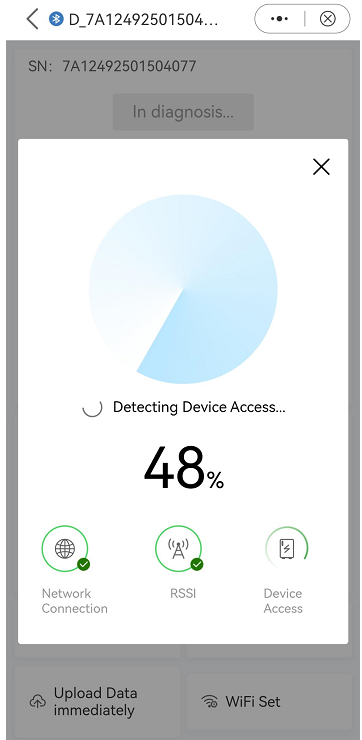
Step 5: Wait for your phone to connect to the logger.
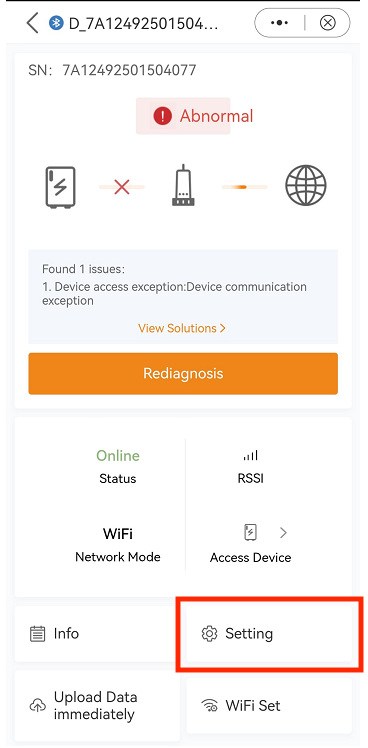
Step 6: Tap Setting with the little gear icon in the bottom right corner of the screen.
Step 7: Tap LAN Port Settings towards the top of the screen.

Step 8: Tap Static IP in the top right corner.

Step 9: Enter in the static IP address and fill in the other fields like Gateway, Subnet Mask, etc.,
Tap Save at the bottom of the screen and then tap Confirm.

After tapping Confirm. You can now create a plant on SolisCloud if you have not already done so. Then, be sure to add the logger to the plant. Wait about 5-10 minutes after tapping Confirm to see the plant reporting on SolisCloud.
Check the green NET light on the logger. If it goes solid, there is a successful LAN connection to the internet. If the light keeps flashing and never goes solid, the LAN connection is not working. Check your cable thoroughly and be sure you have set the right IP details.
If the logger continues to not report, please use your phone as a hotspot and check that the logger is able to connect via Wi-Fi to your hotspot. Steps on how to connect via Wi-Fi are shown in this video: https://youtu.be/r0eBxL_Ankc?si=nYGvSkmYSa6d2H4s
Was this article helpful?
That’s Great!
Thank you for your feedback
Sorry! We couldn't be helpful
Thank you for your feedback
Feedback sent
We appreciate your effort and will try to fix the article